How to Use a Ryobi Trim Router
To use a Ryobi trim router, secure the workpiece, install the correct bit, set a shallow depth, and guide the router against the direction of bit rotation. Make several light passes instead of forcing one deep cut.
On this page (9 sections)
- What should you do before using a Ryobi trim router?
- How do you install and set the router bit?
- How do you guide a Ryobi trim router through a cut?
- How do you make straight cuts with a trim router?
- How do you choose router speed and feed rate?
- How do you reduce dust and tear-out?
- How should you care for the router after a cut?
- When should you use a router table instead?
- What is the safest way to finish a Ryobi trim router cut?
To use a Ryobi trim router, secure the workpiece, install the bit, set a shallow depth, and move the router against the bit's rotation. Make light passes, keep the base flat, and let the bit cut without forcing the tool.
A trim router works well for rounding edges, trimming laminate, cutting shallow grooves, and following a template. Before choosing a tool, compare the main differences in our guide to wood routers for woodworking.
What should you do before using a Ryobi trim router?
Prepare the router, bit, workpiece, and work area before switching on the motor. Remove the battery or unplug the router while installing the bit, adjusting the base, or making any other change.
Clamp the workpiece to a stable surface. Keep the clamps outside the router's travel path, and make sure the piece cannot shift when the bit contacts the wood.
Inspect the bit for chips, resin, or a damaged cutting edge. Use a bit that matches the cut, and make sure its shank fits the Ryobi collet correctly.
Mark the start and stop points on the workpiece. Check that the router base can stay flat throughout the cut, especially near narrow edges or corners.
A trim router needs room for the base and your hands. If the job involves deeper cuts or larger bits, compare best trim routers for woodworking before you begin.
For a different approach to deeper routing, see trim router vs plunge router.
How do you install and set the router bit?
Insert the bit fully into the collet, then pull it back slightly before tightening. This gives the collet room to grip the shank instead of bottoming out inside the motor.
Use the wrench supplied with your Ryobi router and tighten the collet firmly. Do not leave the bit only partly engaged, because a loose bit can move or come out during use.
Set the bit depth with the router unplugged or the battery removed. Start with the cutting edge barely below the base for a first test pass, then increase the depth in small steps.
A shallow first pass shows how the wood reacts and helps reduce chatter and tear-out. For a groove or dado, measure from the router base to the bit and confirm the position with a scrap piece.
Which bit should you use?
Choose the bit by the shape or cut you need. A straight bit makes grooves and dados, a round-over bit shapes an edge, and a flush-trim bit follows an existing edge or template.
Use a sharp bit with a clean shank. For plywood, veneer, or laminate, plan the feed direction and test on scrap because thin surface layers can chip more easily.
For routed grooves and edge details, our guide to the upcut vs downcut spiral router bit explains how the flute direction changes chip movement and surface results.
How do you guide a Ryobi trim router through a cut?
Keep the router base flat and move at a steady pace without pushing faster than the bit can cut. Let the motor reach full speed before the bit touches the workpiece.
On an outside edge, conventional routing usually means moving from left to right. The rotating bit pulls the tool toward the edge, which helps keep the base pressed against the reference surface.
Keep both hands on the router when the cut allows it. Hold the tool upright, watch the bit area, and avoid reaching across the cutting path.
Start the router before entering the wood and leave the workpiece before switching it off. This avoids dropping a spinning bit into the edge or stopping while the bit is still engaged.
For a long edge, keep your body positioned so you can finish the cut without twisting. If the router begins to chatter, reduce the depth, slow your feed slightly, or check the bit and workpiece.
Can a compact router help with this work?
A compact router can suit readers who want more control for edge work and shallow cuts. The trim router vs compact router comparison can help you decide whether a smaller trim-focused tool matches the jobs you plan to do.
The DEWALT 20V Max XR Cordless Router is a useful reference for the kind of controls that make trim routing easier to manage. Its fixed base, depth adjustment ring, variable-speed dial, dual LEDs, soft start, and electronic brake suit readers who want cordless operation with clear bit visibility.
It is a tool-only model, so confirm that your battery setup matches before planning a job. Its maximum rotational speed is 25,500 rpm, and its included components are a fixed base, instruction manual, wrench, and router motor.
How do you make straight cuts with a trim router?
Use a clamped guide or template when the cut must stay straight. Measure the distance from the bit's cutting edge to the router base, then position the guide to account for that offset.
Clamp the guide at both ends if possible. Check the router's full travel before switching it on, and leave enough room for the base to remain supported after the bit exits the wood.
Make a test cut in scrap with the same thickness and material. Confirm the groove width, depth, and location before routing the finished piece.
A straight guide works well for shallow dados, hinge recesses, and edge details. For a router table setup, see our how to use a router table video, especially when the workpiece is small or the cut needs repeatable positioning.
Is a corded router useful for trim work?
A corded router can suit a workshop where continuous power matters and a cable will not interfere with the cut. The AVID POWER model combines a fixed base with 6 variable speeds and a 6.5 amp, 1.25 HP motor.
The AVID POWER 6.5 Amp 1.25 HP Compact includes a router, 5 router bits, 1/4 in and 3/8 in collets, an edge guide, roller guide, wrench, spare carbon brushes, and a dust hood. Its stated speed range is 10,000 to 32,000 rpm.
Choose it if a corded setup and included accessories fit your work. Its 120-volt power source and 4.4 lb weight make cable placement and support part of your setup.
How do you choose router speed and feed rate?
Use a lower speed for larger bits and a higher speed for smaller bits, while following the bit maker's guidance. The goal is to remove material steadily without burning the wood or overloading the motor.
Make a test pass in scrap when the wood, bit, or cut changes. Dark burn marks can mean the bit is moving too slowly, the cut is too deep, or the bit is dull.
Do not compensate for a dull bit by pushing harder. Reduce the depth, clean or replace the bit, and check that the collet is gripping the shank securely.
Hardwood, softwood, plywood, and laminate can behave differently. Use shallow passes and support thin workpieces so vibration does not affect the cut.
How do you reduce dust and tear-out?
Use dust collection when the router and hood support it, and plan the feed direction around the wood grain. Dust control keeps the cut line easier to see and reduces cleanup.
A dust hood can connect to a suitable shop vacuum when the router setup allows it. Keep the hose away from the bit and check that it does not pull the router off the edge.
Route end grain carefully because the bit can chip the far corner as it exits. A climb cut on a small section can reduce tear-out, but it also makes the router easier to pull, so use only a controlled shallow pass.
Another option is to leave a small amount of material at the corner, then remove it with a final light pass from the safer direction. Test the method on scrap first.
How should you care for the router after a cut?
Remove dust, inspect the bit, and store the router with the bit removed or safely protected. Disconnect power before cleaning around the collet, base, vents, or adjustment parts.
Brush dust from the base and motor openings with a suitable soft brush. Keep the collet and bit shank free of resin and debris so the bit seats correctly next time.
Check the base for damage and confirm that depth adjustments still lock firmly. Replace a bit that has chips, cracks, or a damaged shank.
Does a cordless model suit repeated routing?
A cordless model can suit readers who value movement around a workpiece and do not want a power cord across the bench. The Milwaukee Cordless Compact Router uses an 18-volt battery power source and has a fixed base.
The Milwaukee Cordless Compact Router has a POWERSTATE brushless motor, REDLINK PLUS protection features, a variable-speed dial, and a macro-adjust button with a 1.5 in adjustable range. Its included components are the unit and an instruction guide.
Choose it if those adjustment controls and cordless format match your work. The tool weighs 4.8 lb, so consider how long you need to hold it and how much support the workpiece provides.
For more cordless options, compare the best cordless compact router and best cordless router for woodworking guides.
When should you use a router table instead?
Use a router table when the workpiece is small, the cut needs repeated positioning, or you need both hands on the material. A handheld trim router is often simpler for edge work and template routing.
A table can help keep a cut aligned, but it adds setup steps. Confirm that the router, base, bit, and table accessories are compatible before mounting anything.
Use a push block or other approved control method for small pieces. Keep your hands away from the bit and follow the router table and router instructions.
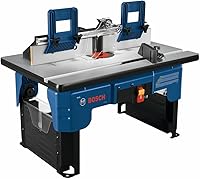
If you are comparing setups, review best router table on sale for table features and fit before choosing one.
What is the safest way to finish a Ryobi trim router cut?
Finish each cut with the router still supported, then switch it off and wait for the bit to stop before setting it down. Remove the battery or unplug the tool before changing the bit or clearing dust.
Choose the tool based on the work. A cordless fixed-base router suits mobile edge work, the AVID POWER model adds guides and bits in a corded kit, and the Milwaukee model offers cordless control with a 1.5 in macro-adjustment range.
Start every project with a shallow test pass, guide the router steadily, and let the bit do the cutting. If your next job needs a table-mounted setup, use the router table guide before changing from handheld routing.
Frequently asked questions
How deep should a Ryobi trim router cut?
Set the bit to remove only a small amount of wood per pass. Start with a shallow cut, check the result, and lower the bit gradually if more material must be removed.
The right depth depends on the bit, wood, edge profile, and cut, so avoid trying to reach the final depth in one pass.
Which direction do you move a Ryobi trim router?
For a typical outside edge, move the trim router from left to right so the bit rotates into the work and the base stays pressed against the edge. This is called conventional routing.
Keep both hands on the router and slow down before corners.
Can you use a trim router for straight cuts?
Yes, a trim router can make straight grooves, dados, and edge cuts when you pair it with a straight guide, clamp, or router template. Mark the cut, secure the guide firmly, and make shallow passes.
A trim router is better for lighter work than deep stock removal.
What safety gear do you need for a trim router?
Wear eye protection and hearing protection, secure loose clothing and hair, and control dust with suitable extraction. Disconnect the router before changing the bit.
Inspect the bit and workpiece first, then keep the cord or battery clear of the cutting path.