How to Set a Router Bit
To set a router bit, unplug the router, clean the collet, insert the shank to the correct depth, tighten it firmly, and check the bit before routing. Make a shallow test cut before the final pass.
On this page (9 sections)
- What should you check before setting a router bit?
- How do you insert a router bit?
- How tight should the router collet be?
- How do you check router bit clearance?
- Which router bit set helps with basic setup?
- How do you make the first test cut?
- Which direction should you move the router?
- How do you set a router bit in a router table?
- What is the safest way to finish the setup?
To set a router bit, unplug the router, clean the collet, insert the shank correctly, tighten the nut, and check the bit's clearance before switching the tool on. Make a shallow test cut in scrap wood before routing the workpiece.
A secure setup starts with the router, bit, collet, and workpiece. Read the router manual for its collet procedure and speed range, then use the bit maker's instructions for the bit profile.
What should you check before setting a router bit?
Check the shank size, bit condition, router collet, and workpiece support first. A 1/4 inch shank belongs in a 1/4 inch collet, and the bit should have no visible damage, resin buildup, or loose bearing.
Unplug the router or remove its battery before opening the collet. Lock the spindle if the router has a spindle-lock button, then use the correct wrench for the collet nut.
Inspect the collet for dust and chips. Clean it with a dry brush or the method approved by the router maker, and never install a bit into a collet packed with debris.
Your workpiece must be held firmly. Use clamps that keep the board stable while leaving enough room for the router base to travel.
For help choosing the right machine for your work, see our guide to wood routers for woodworking. A router's collet size limits which shanks you can use.
How do you insert a router bit?
Insert the router bit shank straight into the collet, then leave the cutting portion and bearing outside the collet. Do not bottom the shank against the inside of the collet.
Hold the bit by its shank or a clean cloth, not by a sharp cutting edge. Slide it into the collet without twisting it sideways.
The correct insertion depth gives the collet enough shank to grip while keeping the cutters clear. If the bit has a bearing guide, make sure the bearing can turn freely and does not sit inside the collet.
Pull the bit back slightly from the bottom if your router instructions call for that clearance. The shank should remain deep enough for a secure grip.
How to set a router bit for the cut depth
Set the bit height so the cutter reaches only as far as the planned cut requires. Use the router's height adjustment, then lock the base or plunge mechanism before routing.
For a deep groove, mortise, or edge profile, use several shallow passes instead of forcing the full depth in one pass. This helps you control the router and reduces the load on the bit.
A straight bit, roundover bit, and flush trim bit each need a different height. The bit's profile determines what the final edge will look like, so check the cut against a scrap piece first.
If you need a rounded edge, our guide to how to use a roundover router bit explains setup and pass direction.
How tight should the router collet be?
Tighten the collet firmly with the correct wrench, but do not use an extension or excessive force. The bit must not move when you apply light hand pressure after tightening.
Keep the bit centered as you tighten the nut. If it shifts, loosen the collet, reseat the shank, and tighten it again.
After tightening, rotate the bit by hand if the router design allows it. Look for wobble, contact with the base, and anything that could strike the workpiece or guide.
The Hiltex Router Bit Set suits a shop that wants 15 carbide-tipped bits with universal 1/4 inch shanks for edging, trimming, grooving, and joinery.
Use the individual profiles according to the cut you need. The set includes straight, core box, cove, V-groove, mortising, roundover, dovetail, Roman ogee, chamfer, panel pilot, and flush trim bits.
How do you check router bit clearance?
Check clearance with the router unplugged before every cut. The bit should not touch the base, guide, clamps, bench, or any part of the router when you move the tool through its planned path.
Set the router on the workpiece or a matching scrap board. Move it through the start and finish positions without power to confirm that the base stays flat and the bit has room.
If you use a bearing-guided bit, turn the bearing by hand. It should not bind against the workpiece or router base.
Keep your hands away from the cutter path. Secure loose clothing, clear the bench, and wear eye and hearing protection suited to the tool.
OSHA's woodworking machinery safety guidance covers guarding and safe work practices.
Which router bit set helps with basic setup?
The KOWOOD Router Bits Set of 15 Pieces suits beginner woodworkers who want a 1/4 inch shank set for wood, MDF, particle board, plywood, and compact panel work.
The set's 1/4 inch shanks fit most handheld or table routers with a matching collet. Do not use these bits on ferrous metal or other non-wood materials such as steel, iron, or sand.
Before routing, choose the bit profile, set the depth, and confirm that the material is supported. A general-purpose set is useful only when the bit shape matches the edge, groove, or joint you need.
For more profile choices, compare best router bit sets. If you already own a DeWalt router, our guide to the best DeWalt router bit set can narrow the options.
How do you make the first test cut?
Make a shallow test cut in scrap from the same material whenever possible. The test reveals whether the bit height, feed direction, edge position, and profile match your plan.
Clamp the scrap securely and place the router base flat before starting. Keep the cord or battery clear of the cutting path.
Move the router at a steady speed. If the cut is too shallow, adjust the height and repeat rather than pushing harder.
Inspect the edge for burning, tear-out, chatter, or an uneven profile. A problem at this stage is easier to correct on scrap than on the final board.
The BOSCH RBS015MBS 15-Piece Carbide-Tipped Wood Router Bits Set suits woodworkers who need varied carbide-tipped profiles for soft wood, hard wood, and wood composites.
Its hardened steel shanks and anti-friction coating support repeated setup and cleanup between cuts. The set weighs 2.3 lb, so store it where the case is easy to lift without dropping the bits.
See best Bosch router bits for more Bosch-focused choices. For guide-bearing work, learn how to use a Bosch router guide before starting the cut.
Which direction should you move the router?
Move a handheld router against the bit's rotation for a conventional cut. On a typical outside edge, that usually means moving from left to right when the bit is on the near edge, but confirm the path before powering on.
A climb cut moves with the bit's rotation and can pull the router forward suddenly. Avoid it unless you have a specific reason, strong control, and a setup suited to that cut.
Make light passes and keep both hands on the router when the design allows. Start with the base flat, enter the workpiece smoothly, and leave the edge only after the bit clears it.
A spiral bit changes the cutting action and chip movement. Read when to use an upcut spiral router bit before choosing one for a groove or deep cut.
How do you set a router bit in a router table?
Set the bit with the router unplugged, then raise it only enough for the intended cut. Confirm that the fence, insert, guard, and workpiece support are aligned before switching on.
Use featherboards or other approved supports when your table setup calls for them. Keep the stock pressed against the fence and move it steadily through the cutter.
Never reach over the bit to retrieve offcuts. Switch off the router and wait for the bit to stop before changing the setup.
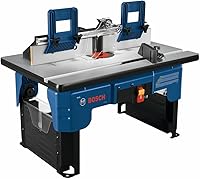
For table-specific guidance, see how to use a Bosch router table. The same basic rules apply: match the shank, secure the bit, set a controlled depth, and test on scrap.
What is the safest way to finish the setup?
Finish by checking the collet, bit height, clearance, workpiece clamps, and test cut. If any part feels uncertain, unplug the router and correct the setup before routing.
Choose a 1/4 inch shank set when your router has a 1/4 inch collet. The Hiltex set fits readers who want many named profiles in one case, KOWOOD suits basic woodwork and beginner projects, and Bosch suits varied carbide-tipped wood cuts.
The key rule for how to set a router bit is simple: insert the shank securely, keep the cutting body clear, tighten the collet correctly, and remove material in controlled passes.
Frequently asked questions
How far should a router bit go into the collet?
Insert enough shank to give the collet a firm grip, while leaving the cutting body and any bearing clear of the collet. Do not bottom the shank against the inside of the collet.
Follow your router and bit instructions for the required insertion depth, then tighten the collet before checking clearance.
Should you bottom out a router bit?
No. Do not press the router bit hard against the bottom of the collet.
Insert the shank, then pull it back slightly if needed so the collet can grip the shank properly.
The cutting edge, bearing, and any raised shoulder must remain outside the collet.
How tight should a router bit be?
Tighten the collet with the correct wrench until the bit is held securely, following the router manufacturer's instructions. Too little force can let the bit slip, while excessive force can damage the collet or nut.
Unplug the router before every bit change.
Can you use a router bit in any router?
Only use a router bit with a shank that matches the router's collet and the bit's intended use. A 1/4 inch shank fits a 1/4 inch collet, but the router must also have enough clearance, speed control, and power for that bit.
Never force an incorrect shank size.